Get Photoshop for free at Adobe-com.
Show me more...
Showing posts with label Downloads. Show all posts
AutoCAD for MAC Free Download
Get your free copy of AutoCAD for MAC.
Català - Castellano - Deutsch
The new version of AutoCAD for Mac is now available for free at the Autodesk Education Community. If you are a student or education professional (with a valid University email address) you can join the Autodesk Education Community and download for free the new AutoCAD for MAC version.
My parents own a 20+ year old "Apple Macintosh SE 1/20" that still works, but unfortunately will not be able to handle a trial of AutoCAD. So you, MAC freaks, will have to give it a try yourself. Hope it works great, this has been for a long time one of the reasons I never went back to using MACs. Maybe my next laptop will be one now that it seems there are less and less reasons not to get one. What do you think?
Oh! I forgot! If you are not a student you can still try AutoCAD for mac here.
Show me more...
Labels:
AutoCAD,
Downloads,
Free Tools,
MAC
SketchUp Plugins: Face Number Reduction
Reduce the number of faces in your model using this easy to use plugin. It will speed up your working time and improve render speed.
Català - Castellano - Deutsch
POLYGON REDUCER (polyreduce.rb) is a SketchUp plugin to reduce the number of faces of SketchUp objects. It is useful especially when we use high poly models imported in our model or when we simply want some surfaces to be simpler and lighter. Below you can see a simple comparison of an object created with the Torus plugin before and after using the polyreduce with the face count on the left.
Above the initial object before using the Plugin. Below the object after running the Polyreduce plugin.
As you can see above, sometimes the object will not look so smooth as before running the plugin. This has an easy solution. We run the Soften Edges function and we can control again which edges are shown and which ones are hidden achieving a better result as it can be seen below.
To use the plugin you must select the faces you want to simplify. Then right click and select "Polyreduce" from the context menu. On the dialog box, you can select the percentage of reduction you want to use. Very useful Plugin!
Show me more...
Labels:
Downloads,
File Clean Up,
Plugins,
SketchUp
SketchUp Plugins: Could this be the Future Grasshopper for SketchUp?
I can only imagine what this Plugin could do in the future...sort of Grasshopper for SketchUp
Català - Castellano - Deutsch
Udi from ModelFunction has sent me a link to a Plugin he has released. The Plugin called ModelFunction aims to simplify the modelling when modifications of the model need to be done. If I understood it properly (I couldn't get it to run on my 64bit Windows 7) it allows to use instances linked to paths to kind of work on the "explicit history" idea similar (much more simpler for now) to what Grasshopper 3D does in Rhino. As I mentioned, I couldn't get it to work still, but there is a quick video from UDI to get a first idea of the possibilities. See it below.
The Plugin can be downloaded here. To install it simply run the .exe file. Apparently for now not compatible with mac or Windows 64 bit.
Show me more...
AutoCAD: SaveAs 2004 Script
A script to save your drawings on a previous AutoCAD version.
Català - Castellano - Deutsch
As I promised on a previous post about Running Scripts on Multiple AutoCAD files, here comes the script to save your files as 2004 version. I found the need of this script recently, when a collaborator of mine was working with AutoCAD 2004 (i didn't know that in advance) and I was working with 2010. After finishing the tweaks on some of the files, he asked me "can you convert them to 2004, otherwise I can't read them". Well there were nearly 40 drawings, so I had no intention to save them one by one to 2004 format. I set myself to generate a script to do that for me.
This is the script file SaveAs2004.scr and let me easily explain how it works. Let's analyse it line by line.
Show me more...
Català - Castellano - Deutsch
As I promised on a previous post about Running Scripts on Multiple AutoCAD files, here comes the script to save your files as 2004 version. I found the need of this script recently, when a collaborator of mine was working with AutoCAD 2004 (i didn't know that in advance) and I was working with 2010. After finishing the tweaks on some of the files, he asked me "can you convert them to 2004, otherwise I can't read them". Well there were nearly 40 drawings, so I had no intention to save them one by one to 2004 format. I set myself to generate a script to do that for me.
This is the script file SaveAs2004.scr and let me easily explain how it works. Let's analyse it line by line.
FILEDIA 0 - This line turns off the dialog boxes (see this post for more info)That's it, now you have a script to save as 2004 version. Replace 2004 by, R14, 2004, 2007, 2010, Standards, DXF or Template, and you will save in that format.
SAVEAS 2004 Y - this part is the proper saving as 2004 version. we call the saveas command, stipulate 2004 (or any other version we want) and then click yes, because the program will ask us if we want to overwrite the existing file. note here that there are 2 spaces between 2004 and Y, this is due to the fact that the first is to enter 2004, and the second is needed, to confirm the file name. (If you want to understand this better, run the different commands manually with the FILEDIA system variable set to 0, and you will be able to see all the steps I am following).
FILEDIA 1 - here I simply wanna make sure that after running the script the settings return to what they were, so i set the FILEDIA SV back to 1.
CLOSE - Closes the file, be sure that there is a space or an enter after close, since it is easy to forget that being the last text in the script file. This is generally not neecessary if you use a batch scripting program such as Autoscript or ScriptPrp, but in case you run the script directly in one file, this will close the file after running it.
Show me more...
Labels:
AutoCAD,
Downloads,
Scripts,
System Variables
AutoCAD Architecture: Recover the Menus Part II
Autodesk keeps making our lives more difficult. Fortunately, there is a way around most of the time...
Català - Castellano - Deutsch
I wrote the other day about how to ditch the ribbon and recover the standard Menu Bar. Well, that solution worked for my AutoCAD 2010 at work. Unfortunately at home I installed the AutoCAD Architecture 2010 Student Version (I am a student too). When I tried to follow the steps exposed on that previous post, I got a message saying, "No Menus are Defined". Apparently, Autodesk is trying to force the use of the Ribbon, so is supplying copies of AutoCAD "menu naked"
The partial solution to this problem was found via the Autodesk Discussion Group. If you download this Zip File and follow the instructions described in it, you will get some of the menus back. Although I think I am still missing some of them...With this solution I got the Menus: File, Edit, View, Insert, Format, Window and Design, is that all??
Show me more...
Labels:
AutoCAD Arch,
Downloads
AutoCAD: Run scripts on multiple files
You can run scripts on multiple files using ScriptPro
Català - Castellano - Deutsch
Imagine that you want to purge 100 files to be sure that not unnecessary information is saved, wasting space. Or imagine that you want to save all the drawings of a project to a previous version of AutoCAD so a consultant of yours can read your files. You don't want do it yourself or appoint someone to do it manually.
What you want is a software to Batch process scripts on multiple files, Autodesk actually provides the application for free.
This application is called ScripPro. You can directly download it here, or go to the information page.
For versions of AutoCAD previous to 2007, you'll need this version instead.
For thsoe who don't know what scripts are in AutoCAD, just imagine them as entering a set of commands without typing them manually. You can save them in a text file, and when you run the scrip file (by entering the SCRIPT command) all the set of commands will run one after the other.
I will post an example script soon, so those who are new to scripts can get a better idea of what they do. I already posted another example before explaining how to create a script to generate all your standard layers.
Update: The installer of ScriptPro is for 32Bit windows only...my 64bit windows doesn't like it, i get "not compatible with operationg system,,,crap!"
Update 2: I found this freeware software called Autoscript that runs on Windows 7 64bit. It adds a new menu called autoscript, that actually doesn't work!!! but if you type AUTOSCRIPT as a command it will run a program that works the same way as ScriptPro. Via Cadig.
Show me more...
Català - Castellano - Deutsch
Imagine that you want to purge 100 files to be sure that not unnecessary information is saved, wasting space. Or imagine that you want to save all the drawings of a project to a previous version of AutoCAD so a consultant of yours can read your files. You don't want do it yourself or appoint someone to do it manually.
What you want is a software to Batch process scripts on multiple files, Autodesk actually provides the application for free.
This application is called ScripPro. You can directly download it here, or go to the information page.
For versions of AutoCAD previous to 2007, you'll need this version instead.
For thsoe who don't know what scripts are in AutoCAD, just imagine them as entering a set of commands without typing them manually. You can save them in a text file, and when you run the scrip file (by entering the SCRIPT command) all the set of commands will run one after the other.
I will post an example script soon, so those who are new to scripts can get a better idea of what they do. I already posted another example before explaining how to create a script to generate all your standard layers.
Update: The installer of ScriptPro is for 32Bit windows only...my 64bit windows doesn't like it, i get "not compatible with operationg system,,,crap!"
Update 2: I found this freeware software called Autoscript that runs on Windows 7 64bit. It adds a new menu called autoscript, that actually doesn't work!!! but if you type AUTOSCRIPT as a command it will run a program that works the same way as ScriptPro. Via Cadig.
Show me more...
AutoCAD: Set of Free AutoLisp Routines
A set of free AutoLISP routines for AutoCAD
Català - Castellano - Deutsch
My friend Aarti just sent me a link to a website that has collected a bunch of free AutoLISP routines. I haven't had time to check them one by one but I thought I'd post the link here in case you want to give it a look.
The one she told me she used was TLEN.lsp, that allows you to callculate the total length of a set of linear objects (lines, polylines, ecs) etc. Saving a lot of time when you have to do some measurements.
Here is the link to the list of free LISP
Show me more...
SketchUp Plugins: Create a Fly through animation
Do you need to create a flythrough animation in SketchUp? Use this plugin to set up the scenes.
Català - Castellano - Deutsch
The Flightpath.rb Plugin allows you to easily create fly through type of animation. It is very simple to use and has several options to set the target of the camera.
If you want to do a fly through sort of animation, you probably want to use the first option, which basically creates an animation where the camera follows the path (it basically uses the next node or vertex of the path as the camera target). For other sort of animations (like the one I am going to show on the next post) you can use the other three options which basically let you choose if the camera points to a single target all the time, if it changes target on a straight line from one point to another, or if the target moves also on a second path.
The Plugin can be downloaded here for free. There is a newer version of the plugin called Flightpath 2, also available at Smustard, it costs 7$, but I haven't tested it.
Show me more...
Autodesk - Graphisoft - Nemetschek Software for Free
Are you a student? Then you are lucky, the major CAD and BIM vendors will let you download their products for free.
Català - Castellano - Deutsch
Going back to school has an advantage, and that is that you can get free versions of the major CAD and BIM software available. If you are trying to learn a new software, or simply need to use on your personal computer the software that you already have available in the school PCs, don't bother looking for pirated versions. Most of the major vendors will let you get a free version of their products if you have an email address provided by your school. See that this are not intended to be 30 day trial versions, but 1 year subscriptions (except for 3Ds and Maya, only 6 months)Here come the links.
Autodesk Education Community: Here you will be able to download for free the following programs:
Bentley only seems to provide a FREE version of their Microstation PowerDraft V8 XM Edition. But I thought I'd mention it here anyways.
Show me more...
Català - Castellano - Deutsch
Going back to school has an advantage, and that is that you can get free versions of the major CAD and BIM software available. If you are trying to learn a new software, or simply need to use on your personal computer the software that you already have available in the school PCs, don't bother looking for pirated versions. Most of the major vendors will let you get a free version of their products if you have an email address provided by your school. See that this are not intended to be 30 day trial versions, but 1 year subscriptions (except for 3Ds and Maya, only 6 months)Here come the links.
Autodesk Education Community: Here you will be able to download for free the following programs:
- Autodesk Revit Architecture
- Autodesk Reevit Structure
- Autodesk Revit MEP
- AutoCAD
- AutoCAD Architecture
- AutoCAD Civil 3D
- AutoCAD Electrical
- AutoCAD Map 3D
- AutoCAD MEP
- AutoCAD Mechanical
- AutoCAD p and ID
- AutoCAD Structural Detailing
- Autodesk Ecotect
- AutoCAD Raster Design
- Autodesk Impression
- Autodesk Maya
- Autodesk 3Ds Max
- Autodesk 3Ds Max Design
- Autodesk Navisworks Manage
- Autodesk Algor Simulation Professional
- Autodesk Alias Automotive
- Autodesk Inventor Professional
- Autodesk Robot Structural Analysis Professional
- Autodesk Showcase
- Autodesk Sketchbook Pro
- ArchiCAD 12
- Artlantis Studio 2.1
- Cigraph Bundle
- MEP Modeler
- ECO Designer
- CADImage
- Objective
Bentley only seems to provide a FREE version of their Microstation PowerDraft V8 XM Edition. But I thought I'd mention it here anyways.
Show me more...
SketchUp: Easy Paint different Objects with Random colors
Need to paint a bunch of faces randomly? Don't do it manually, there is a plugin for that.
Català - Castellano - Deutsch
Chris Fullmer published a while ago the plugin clf_extrapolate_colors.rb that allows us to paint a bunch of faces with random colors. It is very easy to use and it allows a good level of control on the randomization process, i.e. which colors should appear more often, etc.
On the smustard page where you can download the plugin there is also a very useful video posted by Chris that explains more in depth what this plugin is capable of.
Show me more...
SketchUp Plugins: Simplify Contours
Simplify your inework to optimize your model. Specially useful for site modeling to make terrains simpler.
Català - Castellano - Deutsch
Site modeling can become an issue because the model can become very heavy, specially if we model complex topography. The best way to create a 3D model from your topographic lines is to use the SandBox tools. Simply follow this process.
This will create a terrain, but depending on how detailed your topo lines where, this might create a very heavy (in terms of memory) terrain. If you don't need 100% accuracy on how the terrain is modeled (and almost no one does) and want to optimize your model size, use the SimplifyContours.rb Plugin. This Plugin allows you to select the topo lines (Contours) and simplify them as much as you want/need. If your original topographic lines were splines in AutoCAD this is definitely a must, otherwise your model will become unbearably heavy.
This is a pretty old plugin, but still 4 years later it can save you from a struggle with a super heavy terrain model. Download it here if you please.
Show me more...
Català - Castellano - Deutsch
Site modeling can become an issue because the model can become very heavy, specially if we model complex topography. The best way to create a 3D model from your topographic lines is to use the SandBox tools. Simply follow this process.
- If you have a cad file with the topo lines at the right height each, simply import it to SketchUp (File --> Import --> Select DWG as the file format)
- Then select the topo lines in SketchUp and click on the "from Contours" button in the Sandbox Tool Bar.
This will create a terrain, but depending on how detailed your topo lines where, this might create a very heavy (in terms of memory) terrain. If you don't need 100% accuracy on how the terrain is modeled (and almost no one does) and want to optimize your model size, use the SimplifyContours.rb Plugin. This Plugin allows you to select the topo lines (Contours) and simplify them as much as you want/need. If your original topographic lines were splines in AutoCAD this is definitely a must, otherwise your model will become unbearably heavy.
This is a pretty old plugin, but still 4 years later it can save you from a struggle with a super heavy terrain model. Download it here if you please.
Show me more...
Labels:
Downloads,
File Clean Up,
Plugins,
Site Design,
SketchUp
SketchUp Plugins: Extrude Multiple faces at Once
Is there a way to offset a bunch of faces at once? There is a Plugin of course.
Català - Castellano - Deutsch
If we want to extrude (push/pull) a lot of faces the same distance, we might use the default SketchUp Push Pull tool, but it might take very long if we have a lot of faces. By default, if we push one face and then double click on different one, the new one will be push/pulled the same distance.
But what happens if we have 100 faces and we want to push them all the same distance? We need a piece of code to do that. The simplest ruby I found is called multiple_push_pull.rb. It does exactly that. We select all teh faces we want to extrude, go to Plugins --> Multiple Push Pull (after installing the Plugin of course). The result will be all the faces extruded the same distance. See this couple of examples.
I don;t know who wrote the plugin originally since the code doesn;t have any credits. In any case you can download it here.
Show me more...
SketchUp Plugin: Draw Polylines, Bezier Curves, Splines and Chamfered PLines
Do you find the default Bezier curve tool hard to use? This plugin will make dealing with Bezier Curves and other 2D geometry much easier.
Català - Castellano - Deutsch
Fredo6 has been busy again creating another amazing Plugin to draw, and most important, edit bezier curves. With it you can draw bezier curves, polylines, B-splines, Courbettes (multi tangent arc polyline), Catmull Splines, F-Splines... Yeah I don't know either the exact meaning of most of these terms, but they are very useful as different methods to draw curves. The best as I mentioned is the possibility to edit them using their control points. This is the toolbar that will appear when you install the Plugin.
The Plugin can be found here. For an extra feature (drawing chamfered Polylines) you will need the extension posted here. To download both the plugin and the chamfer extension, you will need to be registered at Sketchucation.com. See some shapes generated with the different curves and the option "close loop nicely".
Show me more...
SketchUp Plugins: Create Custom Windows / Curtain Walls
Easily create Windows with a Plugin that works as good as windowizer but that will do any window shape or custom design.
Català - Castellano - Deutsch
I wrote not so long ago about Rick Wilson´s Windowizer Plugin to create Windows from a face. Windowizer is great, but it only creates windows based on a regular grid (number of rows - number of columns).
TIG's Latticeizer (Laticeizer.rb) does what Windowizer 3.0 can't. It creates a window with it's mullions and glass parts from a series of faces, cleaning up the intersections very neatly. See how from this set of faces (all faces have to be coplanar) i easily created a custom window.
All faces need to be coplanar and need to be Grouped. The dialog Box will let yo choose the settings, sizes, colors, etc. Pretty Cool. Thanks TIG!!
Download the Plugin Here.
Show me more...
SketchUp: Site Design - Randomizing Vegetation
How do you randomize the scale and rotation of a series of objects? Wiht one of Chris Fullmer's Plugins!
Català - Castellano - Deutsch
On my recent post about site design, we saw how to easily place trees on site using the Drop plugin.
Once those trees where placed I found myself wanting them to be a bit more random. I didn't like the fact that all of them where the same size. The intention was to ebable to Select them all and turn them into randomly scaled-rotated copies. So I asked at the Sketchucation Forums, and I got the answer to my wishes.
Chris Fullmer's SCALE ROTATE MULTIPLE (clf_scale_rotate_multiple.rb) does exactly that. You simply select a set ob objects, and run the plugin through Plugins --> Chris Fullmer Tools --> Scale and Rotate Multiple --> Scale and Rotate All Randomly. On the dialog box you set the paramaters of maxim and minimum scale and maximum and minimum rotation and that's it. See how the All equal trees on the first image become randomly scaled on the second one.
IN this case the rotation doesn't matter because of the simplicity of the tree component, but if I ever replace it with a more complex/realistic tree, the instances will be also randomly rotated.
To download the Plugin and to see a quick explanation video, go to the Sketchucation original thread (need to be registered to download)
Show me more...
Labels:
Downloads,
Plugins,
Site Design,
SketchUp
SketchUp Plugins: Site Modeling - Place Trees
Easily transfer your trees from your 2D drawing to the right position (height) on your site model.
Català - Castellano - Deutsch
I've been working on a complex site model and needed to add several hundred trees on it. I found a Plugin that once you have the trees drawn in CAD 2D makes it a two click process to put the trees on your site.
The plugin drop.rb drops objects till they hit some base plane. This is very useful to place our trees on the site. What we do, is we simply import the file were all the trees are in 2D.
Once we have imported the CAD file with the trees into SketchUp, we move the trees higher than our site, select them all and with a right click we select "drop at intersection". The trees will drop till they "hit" the site, each of them being placed at the right height.
Once they are dropped, we can edit one of them to turn them into a 3D tree. Since they were blocks imported from AutoCAD they act like components, so all the trees will be updated.
See this last view of the street wit all 3D trees placed at the right height. All with a two click process.
You can download the plugin here.
Show me more...
Rhino Plugins: Export to SketchUp
Export files from Rhino to SketchUp skipping any oder transition format
Català - Castellano - Deutsch
When exporting files from Program to Program the best way to go is to to the export directly between this two formats. Generic formats like 3Ds work, but tend to make the process tedious, and generally the resulting file needs some clean-up.
For the transition between Rhino and SketchUp, there is a Plugin to export files from the former to the later directly.
The plugin can be downloaded here. More information about it, on the McNeel website.
I've been out on vacation for a couple of weeks. I'll try to catch up with lots of posts I have on a list during the next weeks.
Show me more...
SketchUp Plugins: How to Draw a Helix or a Spiral
Easiy draw helixes or spiral curves with this simple plugin.
Català - Castellano - Deutsch
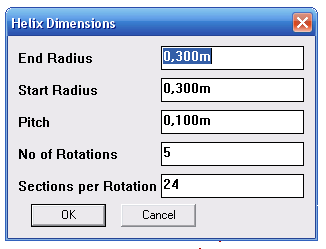
DRAW HELIX (drawhelix13.rb) by Peter Brown allows us to draw helix and spiral curves (flat helix). It is very easy to use and quick. It is accessible via Draw --> Helix (I've modified slightly the original code that was pointing to Draw --> DrawHelix13). It shows a dilog box like the following one, where you can set the different options.
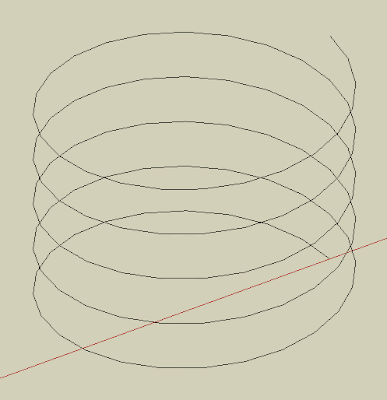
Pitch is the Height of one Helix Rotation. That way, if we set the pitch to 1m and number of rotations to 5, the total heght of the helix will be 5m. The number of segments per rotations will define how many lne segments will form each rotation. This is the result obtained with the default values shown on the image above.
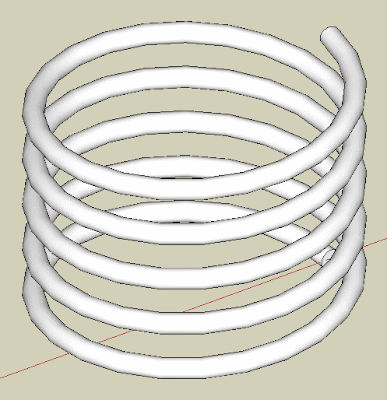
By using a plugin like TUBE ALONG PATH, we are able to turn the helix line generated to a rederable helix.
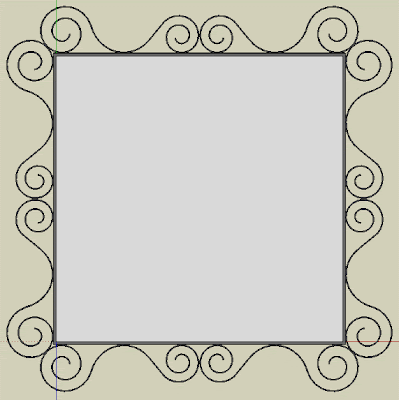
If we want to draw spirals (a flat helix of changing radius) we simply need to set the Pitch to 0. See how I modeled my ugly living room mirror ;).
Chek here how to Install SketchUp Plugins.
Show me more...
SketchUp Plugins: Slice Your Model
Do you need to get slices of your SketchUp model to build a real life model? Slice it easily with this Plugin.
Català - Castellano - Deutsch
A common process in my office is to design some of the buildings in SketchUp and then build physical models of them cutting the pieces with a laser machine. With simple geometry this is no problem, and it is easy to draw the outlines of the pieces in AutoCAD to send them to the laser cutter. When the Gemoetry is more complex the process requires a bit more effort.
SLICER (slicer.rb) is a Plugin that helps doing this. The Plugin generates slices from a given 3D model and you can choose which axis you want to use for the slices to be generated.
See the following example. I used the same terrain I used on a previous post and I created slices of it every 5m.
The plugin even asks you if you want a flattened copy of your slices, which basically means that it will spread the slices on the ground plane, so you can just set a Top view and Export to AutoCAD. See the image of this other simpler model.
Of course CAD exports from SketchUp are not always very clean, so there might be some tweaking needed before using a laser cutter, but this definitely speeds up the process. To use the plugin, select a Group or Component, go to Plugins --> Slicer and then use the dialog box to configure how the slices should be created. Download the Plugin here.
Chek here how to Install SketchUp Plugins.
Show me more...
Subscribe to:
Posts (Atom)