Get Photoshop for free at Adobe-com.
Show me more...
Showing posts with label Photoshop. Show all posts
Photoshop: Cropped Image Disappears
What to do if your crop tool makes the image disappear? Easy, easy...
Català - Castellano - Deutsch
Was trying to crop one of the images for one of my posts here and I encountered the problem that when I used the Crop tool, instead of doing the crop operation, photoshop was turning my image into 1 single pixel. I had no clue what was wrong, tried to restart the program but the problem persisted. Finnally I realised that the problem was that for some reason, on the Crop Bar, on the width box it said "1 px". Well, simply removing that and leaving all boxes blank solved the problem.
An easy solution, but took me a while to find out.
Show me more...
Labels:
Photoshop
Potoshop: CS5 New Feature - Content-Aware Fill
An amazing new feature that will be available in the new CS5 version.
Català - Castellano - Deutsch
Ever wanted to erase some element from a picture using photoshop? Depending on the image, this might take ages, because the background might be very complicated to duplicate. Adobe is announcing an amazing new feature called Content-Aware Fill that apparently makes this a piece of cake. See the video below...It even seems to good to be true...
To read more about the new features of Potoshop CS5 go to the PCWorld Article about it. Photoshop CS5 can be preordered at Adobe.com, it will ship around mid-May 2010.
Show me more...
Photoshop: Shortcut to select all the contents of a layer
Select all layer contents wit a single click
Català - Castellano - Deutsch
When working with Photoshop sometimes we might want to get a selection of the entire content of a layer. This is useful for man reasons. An easy way to do this is to go to the layers tab and click on the thumbnail of the layer with the left mouse button while holding CTRL (I guess command key in MAC??)
If you point at the layer thumbnail with your cursor and press CTRL, you will see how the cursor will change from a pointing hand to a pointing hand with a marquee on top. This means that when you click there instead of selecting the layer as active, it will use the contents of that layer to create a selection.
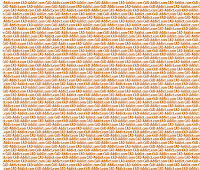
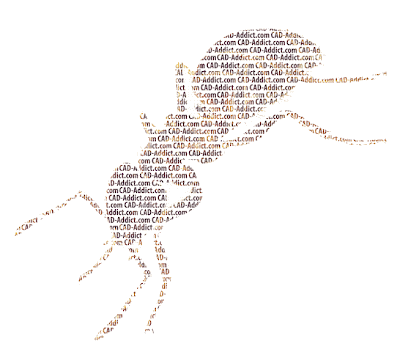
This is very useful to create selections based on the shapes of layers such as texts. See this example that I created using this method. From the following two images...
...i used the one on the right with the multiple CAD-Addict.com texts to create the selection using the explained method. Then, I used the slection to erase parts of the layer on the left. The reslult is as follows
This is a very useful trick to speed up you workflow in pshop.
Show me more...
Labels:
Photoshop
Photoshop: Access a Wide Range of Text Editing Tools
There are many more options to edit Text than you think in Photoshop. You just need to know how to access them.
Català - Castellano - Deutsch
This is one of this tips that some might think "duh!", so I excuse myself in advance for my lack of Photoshop proficiency. But since this website is as much a way for me to share what I learn, as a way to store tips for when I need them and I can't remember here it goes.
When you type texts in Photoshop, the default options available are pretty limited, all contained on the upper toolbar that looks like this (the screenshot is from version CS4).
But if you click on the button on the far right of this toolbar, you will be able to access a full set of tools to edit your texts much more complete that the default text toolbar. Alternatively, this Character Window, can be accessed through Window --> Character (duh again, I know...). On this window you will be able to use Sub- and Superindex characters, use Title Fonts, play with the font spacing etc.
Maybe for many this is the kind of tip that you wonder "how could this guy not know about that?". I know it is a very basic tip, but it is a tip anyway.
Show me more...
Photoshop: Isolate a Layer
How do you Isolate a layer in photoshop?
Català - Castellano - Deutsch
This is probably my shortest post, but I've been using Photoshop a lot lately and this is a very useful trick. When you want to isolate one layer, just press Alt and click on the little eye near the layer you want to isolate. Instead of hiding that layer, it will hide all the others. To turn all the layers back on do the same. One thing though, if you manually switch on one layer while having the layer isolated, then you will have to switch all the others on manually.
Show me more...
Enhancing CAD Drawings with Photoshop
An essential Book if your work flow involves CAD drafting and then the use of Photoshop for presentations
Català - Castellano - Deutsch
Author Scott Onstott published a Book on How to Enhance your CAD Drawings Using Photoshop. Beeing this one of the main processes we usually do I think it was worth mentioning here.
The book has great reviews and it is probably the only one facing this subject directly, so many architect will find it very useful to streamline the way they work daily with this two tools.
The book even comes with an AutoLISP routine to translate AutoCAD layers into Photoshop ones. You have to be careful when you use this routine since it might crash your drawing if you don't have a powerful machine, but it is an efficient tool.
If your regular work scheme involves drafting in CAD and then coloring drawings in Photoshop you should definitively give this book a try. It is worth the price.
Show me more...
Photoshop: Rotate Guides 90 degrees.
Do you want to turn one of the guides 90 degrees? Easy and simple.
Catala - Castellano
This is the kind of thing you come along by mistake. I was trying to copy the contents of a layer in one of my Photoshop files (Alt + drag) and by mistake I pressed Alt and clicked on one of the guides I was using to align my image.
Magic!! The guide turned 90 degrees with the rotation point were I clicked.
I don´t know how useful this can actually be, I just thought I'd share.
Show me more...
Labels:
Photoshop
Photoshop: Zoom using the scroll wheel
Did you know that you can use the scroll wheel to zoom in and out in Photoshop?
Catala - Castellano
Changing from one software to another is sometimes annoying. There are certain things we give for granted that it is hard to get use to not have them in some software.
One of this things is the zooming feature using the Scroll Wheel. It is a very standard feature in most CAD programs. But it is not the default setting for Adobe software.
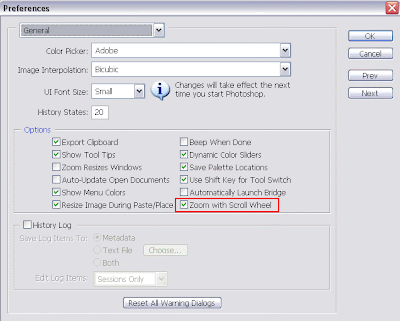
Luckily there is a work around. If we want to be able to use the scroll wheel to zoom in and out in Photoshop, we have two options. We can get used to press Alt (option in MAC) and then use the scroll wheel. This is the default setting in Photoshop. Or we can configure PS to zoom in and out automatically when we turn the scroll wheel.
To do that we simply need to go to Edit --> Preferences --> General. And check the box "Zoom with Scroll Wheel". Easy and simple, see the image below.
Show me more...
Labels:
Photoshop
Photoshop: ICON Creation Plugin.
Customize your desktop icons by easy creating your own .ico filesI always feel writing a bit off topic when adding Photoshop topics here, but still I think they are worth it since in some way or another, most of us end up being involved working with Photoshop at some point. This Plugin might be even more off Topic than others. Still, I felt to share it here.
Show me more...
Some of us like to personalize our desktop and folders in a visual way that help us find the Icons quickly. I personally hate having a whole bunch of Icons that basically have only the image of a folder. I like to differentiate each important folder with a personalized icon, so when i need to access them either from my desktop or from the Quick Access bar it is easy and very visual.
Long time ago I tried a program call Microangelo, that worked pretty good, but it has only a 30 day free trial.
Since Photoshop is probably already installed in your machine, a much better option is a plugin for this program that allows you to save any image to an ICON (.ico) format. On this website you can download the ICON plugin for free. The plugin is under the GNU General Public License.
Show me more...
Photoshop: Fade Layers
A quick trick to create a fading effect on photoshop layers.
Català - Castellano
This is a bit off topic, but since Photoshop is one of the main tools we use to present what we first draw or model i think it is not completely out of place.
The fading effect for a layer is a very successful effect when making presentations. We might want to fade an image that we have to blend into another one or simply to make it disappear gradually.
The process is very simple. I´ll use a picture I took last week in Toronto.
I want the picture to fade till disappear. We need to add a layer mask. What we need to do is to select the layer we want to fade and click on the button shown in the image below.This will add a layer mask to the layer we want to fade. A layer mask is basically a transparency map for the layer it is applied to. Once we create the layer mask we will see this:
The layer mask is completely white by default, which means that all the image is set to opaque. If we want to fade the image we must add a gradient from white to black to achieve the fading effect we are looking for. Be sure that you have the layer mas selected and not the layer itself.
In this case I add a circular gradient to make the image fade equally from a center point to the edges. This is the gradient applied to the layer mask:And this is the result
Show me more...
Labels:
Photoshop
Subscribe to:
Posts (Atom)